Composting is an incredibly beneficial and easy way to help the environment. Not only does it reduce waste, but compost also helps your garden grow more healthily.
So if you’re looking for a great way to give back to nature, composting should be at the top of your list!
Wondering where to set up a compost bin?
This article will explain all the different factors you need to consider when deciding where to put your bin, from location to size. Read on to find out how you can set yourself up with the perfect spot for composting success!
Starting with the different types of compost bins available today.
Types Of Compost Bins
Let’s talk about compost bins! You’ll need a sturdy bin for collecting organic material; this will be either plastic or wooden, depending on whether you’re setting up the pile inside or out.
They come in all shapes and sizes, so let’s break it down and look at:
- Indoor compost bins
- Outdoor compost bins
- Store-bought compost bins.
Indoor bins are great for those with limited outdoor space, outdoor bins are great for those with a yard or balcony, and store-bought bins can be great for those who don’t want to make their own.
Indoor Compost Bins
A great way to compost indoors is by using balcony composting, airtight bins and kitchen scraps.
This type of compost bin allows you to transform your organic food waste into a nutrient-rich soil amendment without having to worry about bad odors or pests.
Balcony composters are perfect for small spaces as they can easily fit on a patio or balcony and come in different sizes so you can find the right one for your needs.
By keeping all the kitchen scraps sealed off inside an airtight container, you’ll be able to keep animals and bugs away while producing a quality compost that you can use in your garden.
With these simple steps, anyone can start their own indoor composting program from the comfort of their home!
Outdoor Compost Bins
If you’re looking to take your composting outdoors, there are several options available.
Outdoor compost bins have many benefits that make them great for larger spaces and those in more rural areas.
These bins allow for better aeration techniques, which helps speed up the decomposition process.
Plus, with outdoor composters you can try out different recipes and pest control methods without worrying about making a mess indoors.
From traditional tumbler-style designs to multi-level models, there are plenty of ways to customize an outdoor bin to fit your needs.
So if you want to be able to create bigger batches of nutrient-rich soil amendments for your garden or farm – then look no further than outdoor compost bins!
Store-Bought Compost Bins
If you’re looking for a more convenient option when it comes to composting, why not try out store-bought bins? These pre-manufactured models make setting up your compost pile super easy – all you need is the right tools and techniques.
Plus, with so many different styles available, there’s sure to be one that fits your lifestyle and space requirements perfectly!
From tumblers to multi-level designs, these store-bought options are great for those who want to get their composting going quickly.
With just a few simple steps, you’ll have delicious nutrient-rich soil amendments ready in no time using these effective composting methods. So don’t wait any longer – grab yourself a store-bought bin today and start transforming kitchen waste into garden gold!
Choosing A Location
When it comes to choosing a spot for a compost bin, a few key factors to consider are:
- Proximity to the kitchen.
- Sun exposure.
- Access to water.
Being close to the kitchen makes it easier to add scraps, so you won’t have to go far for disposal. Making sure the bin gets some sunshine helps the compost break down faster and keeps it from becoming a stinky mess. Access to water maintains the right balance of moisture.
Proximity To Kitchen
When choosing the best place to set up a compost bin, it’s important to consider how close it is to your kitchen.
Upcycling kitchen scraps into nutrient-rich soil for your garden is incredibly rewarding and easy to do with a little planning!
Keeping your compost in close proximity will make it easier to remember when you’re busy cooking up delicious meals.
TIP: As much as it’s in proximity to the kitchen, don’t put it next to the cooker – that’s too hot. Avoid very hot and very cold spots, as well as windy spots.
Sun Exposure
Once you’ve got the basics down, it’s time to consider how much sun exposure your compost bin will get.
Creating shade for your compost pile is a must – too much direct sunlight can cause temperatures to skyrocket and moisture levels to drop.
If there’s too much or too little sun exposure, your scraps won’t break down properly. So, make sure you’re managing temperature and controlling moisture by finding an area that gets some natural shade throughout the day.
TIP: But make sure it’s not too close to trees which can attract unwanted critters.
You’ll be able to tell if your compost bin is getting enough sun or not after a few weeks of observation – then you can adjust accordingly!
Access To Water
The next part of finding the right spot for your compost bin is making sure there’s access to water.
While some moisture will come from the scraps you put in, adding a few containers of water nearby can help ensure that your compost never gets too dry.
Alternatively, you can position the bin at a spot where there’s a water source nearby within hose reach.
Having identified the perfect spot for the compost bin, let’s see how to ensure the composting process is a success. Read on!
Tips For Successful Composting
Green To Brown Material Ratio
First off, you should know that most organic materials can be composted – from fruit and vegetable scraps to eggshells, leaves and even grass clippings!
Be sure to maintain a healthy ratio between organic material – Green material (such as grass clippings) and brown material (like dead leaves).
Having a proper mix of organic materials in your compost can ensure success in your endeavor
Generally, having two parts brown material to one part green material is a good place to start.
Layering
Adding nutrient rich materials such as kitchen scraps (fruit peels and vegetable trimmings) will help speed up decomposition and give vital minerals back into the soil in due course. But you’ve got to layer these materials.
Layering different materials will help add more oxygen into the mix as well as provide extra nitrogen for microbes to feed on.
Regular Turning
It will take anywhere from 2 months to two years for the compost to become ready for use depending on how often it’s turned over.
For proper aeration, you should turn it every week or so; but make sure not to do it too frequently as this could cause your compost pile to break down faster than necessary.
You will need a shovel or spade to turn over the pile of compost and an aerating tool like a garden fork to help introduce air into the mixture.
Pest Control
Pest control is also important when creating compost.
Using garlic powder around the edges of the compost bin can serve as an effective deterrent from critters trying to get at your finished compost material.
Avoid Meat And Dairy Products
Meat and dairy products should never be added into your compost bin
These products attract animals (for instance, pets) as well as pests, leading to potential health hazards.
Regulate Moisture Levels
Your piles moisture content should be somewhere between 40-60%.
If you find the compost pile too dry, then water your compost with a spray bottle until damp but not soaking wet.
Conclusion
Composting is an excellent way to reduce the amount of food waste produced, create nutrient-rich soil for your plants, and help the environment in a big way.
If you’re wondering where to place the compost bin, as mentioned above, ensure it’s within close proximity to the kitchen, there’s access to sunlight (and shade, when the sun’s too hot) and access to water.
To check whether your compost is finished, simply look out for dark brown coloration with a rich earthy smell – if those criteria are met then your compost is good to go!
In conclusion, setting up a composter might feel daunting at first but once you understand what materials you can compost and how long it takes before being usable again– you’ll have no fear!
Plus, by taking part in this eco-friendly activity you’re doing something great for our planet; what’s better than that?
Frequently Asked Questions
What Type Of Materials Can I Compost?
Composting is an incredibly rewarding way to reduce your waste, help the environment and produce nutrient-rich soil for growing plants.
Compost materials like:
- Dead leaves
- Plant stalks and twigs
- Untreated wood chips
- Coffee grounds
- Paper tea bags
- Crushed eggshells
- Grass clippings
- Straw
- Fruit peels
- Food and vegetable scraps, etc.
How Long Will It Take For The Pile To Be Ready To Use?
The time taken is dependent on many factors such as aeration methods and temperature but generally speaking you can expect your compost to be ready between two months and a year. Some piles take 2 years.
However, while this may seem like a long time, monitoring the progress will ensure that the end result meets expectations and delivers nutrient-rich soil for gardening projects.
How Often Should I Turn My Compost Pile?
Outdoor composters usually need to turn their piles every two weeks. However, indoor composters should turn more often – about once per week.
Turning your compost pile is essential for managing odors, pest control, and adding the necessary nutrients to make a rich compost.
It also helps to keep temperatures consistent and speeds up decomposition.
No matter which method of composting you choose, there are various techniques that can be used when turning your compost pile such as aerating with a pitchfork or shovel and folding over layers to mix in air pockets.
Is It Safe To Compost Meat And Dairy Products?
It’s not advisable to compost meat and dairy products.
For one, these products attract animals (for instance, pets) as well as pests, leading to potential health hazards.
Composting meat and dairy products also increases the likelihood of awful odors in your backyard.
When done correctly, composting items like green waste such as fruit scraps and vegetable peels won’t result in any nasty odors or spoilage.
How Do I Know When My Compost Is Finished?
Composting is a great way to reduce waste, and it’s also quite rewarding – but you’ll need to know when your compost is finished!
You’ll know that the composting process is complete when the result is a dark brown humus that looks like soil with an earthy smell; no more big chunks should remain.
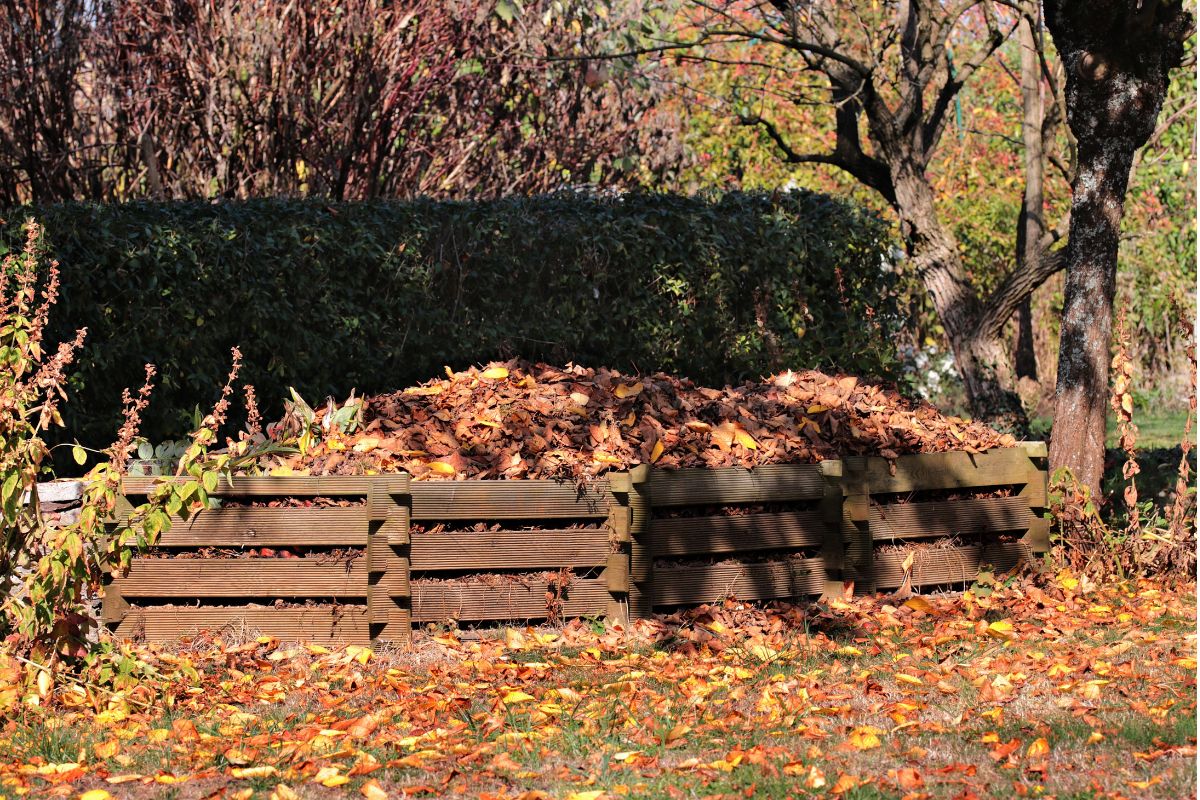
Photo by NoName13.


